
Troubleshooting Common Espresso Machine Leaks

Table of Contents
Where Is the Leak Coming From? A Diagnostic Flowchart
Timing and Liquid Type: Narrowing Down the Source
Espresso Machine Leaking Around the Portafilter: Diagnosis and Repair
Checking Portafilter Fit and Locking
Inspecting and Replacing the Group-Head Seal
Espresso Machine Leaking Water From Bottom: Internal and External Sources
Checking the Water Reservoir and Its Connection
Inspecting Internal Valves and Springs
Testing After a Bottom-Leak Repair
Espresso Machine Drip Tray Leaking: Blockages and Overflow
Cleaning Coffee Grounds and Blockages
Espresso Machine Leaking During Brewing: Pressure and Flow Issues
Inspecting the Shower Screen and Group Head
Common Mistakes to Avoid When Diagnosing Leaks
Safety Limits: When to Stop and Call a Technician
Prevention and Maintenance Schedule
Frequently Asked Questions
Last Updated: October 21, 2026
Where Is the Leak Coming From? A Diagnostic Flowchart
Troubleshooting common espresso machine leaks starts with identifying the exact location and timing of the water escape. Pinpointing the origin cuts repair time in half. Most leaks fall into three categories: around the portafilter, from the machine's bottom, or during brewing.
The first step is observation. Watch your machine during operation and note when water appears: dripping at idle, spraying during extraction, or pooling under the drip tray.
Timing and Liquid Type: Narrowing Down the Source
Pay attention to what leaks and when. Clear water at idle suggests a valve or reservoir connection issue. Coffee-colored liquid during brewing points to a group-head seal problem. Sideways spray during extraction often means portafilter fit problems.
Create a simple mental checklist:
During idle time: Check reservoir connections and internal valves
During brewing: Inspect portafilter seals and group-head fit
From the drip tray: Look for blockages and overflow issues
Espresso Machine Leaking Around the Portafilter: Diagnosis and Repair
Water leaking around the portafilter is one of the most common issues. The portafilter connects to the group head under high brewing pressure, and even small gaps let water escape, usually because the portafilter doesn't fit properly or the group-head seal has worn out.

Checking Portafilter Fit and Locking
Start by examining how the portafilter seats in the group head. Insert it and twist clockwise until it stops; it should require firm pressure but not force.
If the portafilter rotates easily or feels loose, the problem is fit. A worn or damaged portafilter spout won't seal properly. Check for:
Bent or dented spout
Cracks in the metal connection
Grooves worn smooth from repeated use
Tighten the portafilter fully. If water still leaks around the edges during brewing, the seal is compromised and needs replacement.
Inspecting and Replacing the Group-Head Seal
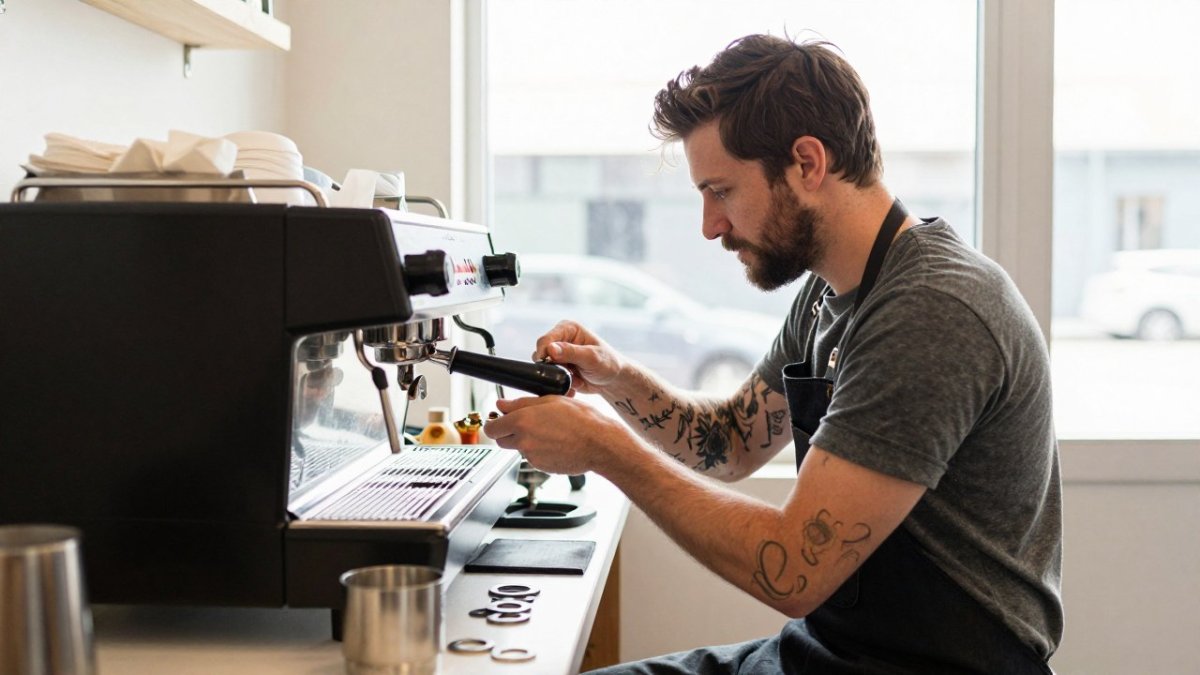
The group-head seal is a rubber or silicone ring that creates a watertight connection, and it wears out over time.
Press gently on the seal with your finger. A good seal feels firm and springs back. A worn seal feels soft, sticky, or flattened.
To replace it:
Remove the shower screen (the metal disk above the group head)
Use a small tool to pry out the old seal
Clean the groove thoroughly
Test by running water through the group head without the portafilter. Water should flow straight down without spraying sideways.
Espresso Machine Leaking Water From Bottom: Internal and External Sources
Water pooling under the machine is the leak category that most often gets misdiagnosed, because the visible puddle is rarely where the water starts. Before you remove a single screw, separate the problem into two systems: the cold side (reservoir, intake tubing, pump inlet, OPV return) and the hot side (boiler fittings, steam valve, group solenoid, expansion valve). Cold-side leaks usually appear at idle or on power-up; hot-side leaks appear only after pressurization and often flash to steam, leaving mineral crust rather than standing water.
BrewFix
Pro Tip Wipe the interior dry, lay a sheet of white paper towel under the machine, and run one controlled test at a time (idle, then brew, then steam). The wet patch on the paper tells you which side of the machine is involved faster than any visual inspection.
Checking the Water Reservoir and Its Connection
Start with the cold side: it is the cheapest fix and the most common cause of bottom leaks.
Remove and reseat the reservoir. Lift it out, inspect the outlet grommet or spigot on the bottom, and check the matching socket on the machine. A hardened or split grommet is a frequent culprit; it looks fine until the reservoir is full and gravity does the rest.
Check the intake fitting. On machines with a threaded fitting, hand-tighten clockwise; on clip-style fittings, confirm the clip is fully seated and the O-ring is present, not rolled or flattened.
Inspect the reservoir body. Hairline cracks near the base or around the outlet are common after repeated hot-water rinses. A cracked reservoir is a replacement part, not a repair.
Follow the intake tube from the reservoir to the pump inlet. Look for loose clamps, splits at the barb, and tubing that has pulled free. Tighten clamps snugly, not gorilla-tight, and replace any tube that is stiff, cloudy, or cracked.
If the leak stops here, you are done. If water still appears at the bottom with the reservoir seated and the machine idle, move to the hot side.
Inspecting Internal Valves and Springs
Hot-side leaks require more disassembly and caution. Unplug the machine and let it cool completely before opening the case; boilers and steam lines stay hot long after the power is off.
Work through the pressure path in order:
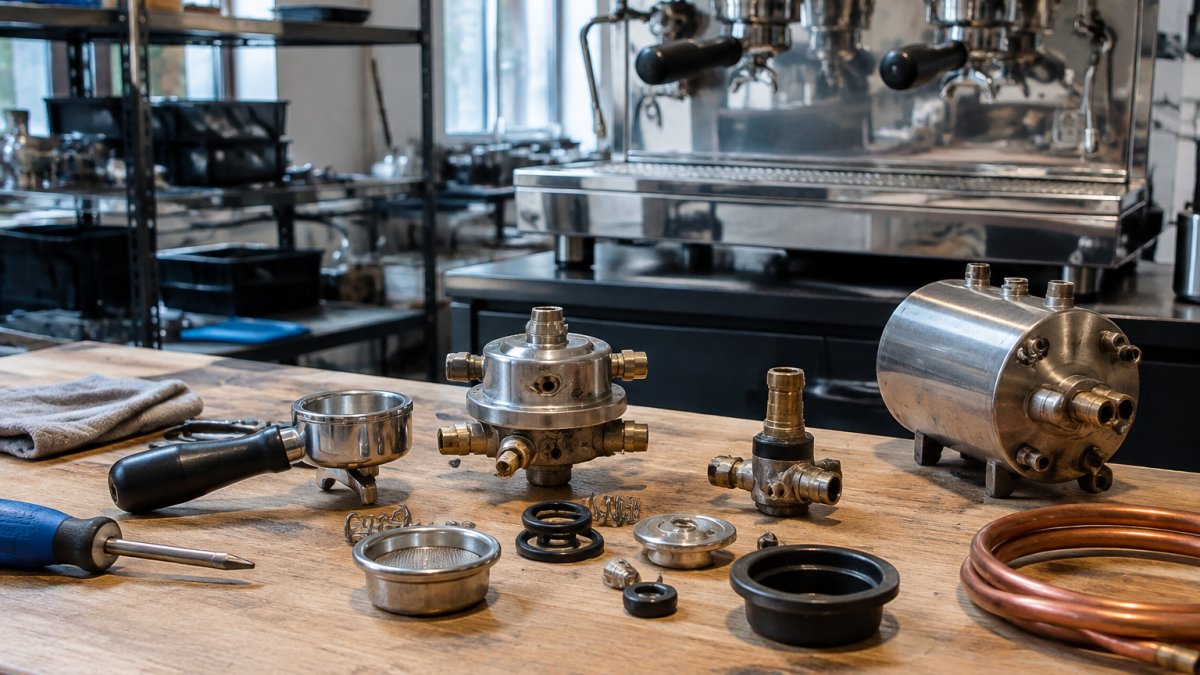
OPV / expansion valve. This valve relieves excess pressure and often has a return line to the reservoir or drip tray. A failed OPV or a disconnected return line produces a steady drip that looks like a bottom leak. Check the return line first; it is the easiest thing to knock loose during cleaning.
Solenoid valve. The brew solenoid opens and closes the water path to the group. Scale or a worn plunger seat causes it to weep continuously. Look for mineral crust around the coil body and the valve seat.
Boiler and fitting seals. Look for white scale trails at the boiler flange, element gasket, and steam-valve packing. A weeping boiler fitting often shows as crust before it shows as a puddle.
Do not open the boiler, the pump head, or any fitting that sits on the pressurized hot side unless you have the manufacturer's procedure and the correct replacement seals on hand. A boiler under residual pressure can release scalding water and steam. If you cannot identify the leaking component from the outside after these checks, stop and call a technician.
Testing After a Bottom-Leak Repair
Reassemble, refill the reservoir, and run three short cycles: idle for two minutes, a brew with a blank basket, and a steam burst. Watch the paper towel and interior for the first sign of moisture. A repair that holds through all three is usually sound; one that weeps only during steaming points to the steam valve or its packing, not the brew circuit.
Espresso Machine Drip Tray Leaking: Blockages and Overflow
A puddle under the drip tray most often gets blamed on the tray itself when the tray is only the messenger. Before you clean anything, ask two questions: when does the water appear, and what is the liquid?
Timing | Liquid | Most likely source |
Idle, no brewing | Clear water | Reservoir connection, OPV return line, or a weeping solenoid |
During brew only | Coffee-colored | Group-head seal, portafilter fit, or a clogged shower screen forcing water sideways |
During steam only | Clear or milky | Steam valve packing or a boiler fitting on the hot side |
After shutdown | Clear, slow drip | Residual pressure bleeding past a valve seat, or a drain line that is partially blocked |
This timing-and-liquid check is the step most guides skip, and the fastest way to avoid replacing a seal when the real fault is a loose return line.
Cleaning Coffee Grounds and Blockages
A genuine tray overflow has three usual causes, and they are not all in the tray.
Blocked drain hole. Remove the tray and find the drain opening at the bottom. Flush it with hot water and clear it with a thin wire or pipe cleaner. Push gently; a sharp tool can scratch the tray or pierce a plastic drain tube.
Clogged shower screen pushing water sideways. If the screen's holes are blocked, water finds the path of least resistance around the portafilter and lands in the tray. Remove the screen, soak it in espresso-machine cleaning solution, and confirm you can see light through the holes before reinstalling.
Misaligned or missing tray insert. The tray must sit fully under the group and the drain must line up with the machine's outlet. A tray that is a few millimeters forward catches the runoff but not the drain, and it overflows on a normal brew.
After clearing, run a full brew cycle with a blank basket and watch the drain. Water should leave the tray smoothly with no backing up. If it still pools, the restriction is downstream of the tray, check the drain tube and internal drip route.
Treat the drip tray as a diagnostic instrument, not just a catch basin. The timing and color of what collects there tell you whether the real leak is cold-side, hot-side, or brew-path, and that decides which of the other sections in this guide you should be working through.
Espresso Machine Leaking During Brewing: Pressure and Flow Issues
Water spraying or leaking during the brewing cycle often points to pressure problems or blockages in the group head. When coffee grounds block the shower screen, water takes an alternate path and leaks sideways.
Inspecting the Shower Screen and Group Head
The shower screen is a metal disk with small holes that distribute water evenly over the coffee grounds. A clogged screen redirects water pressure, causing leaks around the portafilter.
Remove the shower screen by twisting it counterclockwise and hold it up to light.
While the screen is out, inspect the group head itself. Look for:
Cracks or damage
Mineral buildup inside the holes
Coffee grounds stuck in the chamber
Clean the group head with a brush and hot water. Rinse thoroughly. Replace the shower screen and test.
Common Mistakes to Avoid When Diagnosing Leaks
Many people skip the observation step and jump straight to replacing parts, wasting money and time. Always watch your machine operate before making repairs.
Another mistake is ignoring timing.
Don't overtighten connections. This can crack fittings or strip threads. Hand-tighten first, then use a wrench if needed. Stop when you feel resistance.
Avoid regular water for cleaning. Mineral deposits in tap water cause buildup; use distilled water instead to prevent future blockages and extend the life of internal components.
Safety Limits: When to Stop and Call a Technician
Some repairs require professional expertise. Know when to stop and contact a service technician.
Do not disassemble the pump or motor.
Do not open the boiler unless you're trained to do so. Boilers operate under pressure and high temperature.
If you cannot locate the source of a leak after checking the obvious places, stop.
Do not attempt repairs if you're uncomfortable working with the machine.
Prevention and Maintenance Schedule
Regular maintenance prevents most leaks. A simple routine keeps your machine running reliably.
Weekly:
Empty and rinse the drip tray
Backflush the group head (if your machine supports it)
Wipe the portafilter and basket
Monthly:
Soak the shower screen and portafilter in cleaning solution
Clean the group head thoroughly
Check all visible connections for tightness
Quarterly:
Inspect the water reservoir for cracks
Check the tube connections
Run a full cleaning cycle with a cleaning tablet
Annually:
Have a professional inspect internal components
Replace the group-head seal if it shows wear
Check the pump and valve operation
This schedule keeps espresso machine leaks from developing in the first place. Machines that receive regular maintenance rarely develop serious problems.
Water leaks in espresso machines are frustrating, but most are fixable with basic troubleshooting. For leaks that require professional diagnosis or for refurbished Nuova Simonelli espresso machines backed by expert repair services, Request A Quote from our team.
Frequently Asked Questions
Why is my espresso machine leaking around the portafilter?
Leaks around the portafilter usually stem from a worn or damaged group-head seal, or improper portafilter fit and locking. The silicone seal degrades over time with heat and pressure cycles. Check that the portafilter is seated properly in the group head and locked fully. If tightening doesn't stop the leak, the seal likely needs replacement. This is one of the most common espresso machine leaks and typically requires only seal replacement or portafilter repositioning.
What causes an espresso machine to leak water from the bottom?
Water leaking from the bottom usually indicates a problem with the water reservoir connection, internal valves, or valve springs. Check that the reservoir is seated firmly and its connection line is not cracked or loose. If the leak occurs during brewing, an internal valve may be stuck or a spring may have lost tension, allowing water to bypass the normal flow path. Internal leaks are harder to diagnose and may require professional inspection of the machine's internal components.
Why is water leaking into or around the drip tray?
Drip tray leaks often result from blockages caused by coffee grounds or mineral buildup in the drain or overflow channels. Remove and empty the tray, then clean the drain hole and channels thoroughly. If water still overflows, the tray may be positioned incorrectly or the machine's internal drainage system may be clogged. Ensure the tray sits flush under the group head and that no grounds or debris are blocking water flow into the tray.
When should I stop using a leaking espresso machine and call a technician?
Stop using the machine immediately if you see electrical hazards (water pooling near the power cord or heating element), if the leak is large and uncontrolled, or if you've tried basic troubleshooting and the leak persists. Any internal valve leak, spring failure, or leak from the brew unit itself requires professional repair. Do not attempt to disassemble major internal components yourself. Contact a technician if you're unsure whether the problem is safe to address.
Request A Quote

Comments